Why You Should Write Your Scripts and Then Throw Them Away

Today, I am going to reveal to you why you should write your scripts and then get them out of your way.


Since I started creating my own video blogs I started thinking about how long I was taking to write my scripts and then read them word for word to the camera. I watched my videos and I looked so stiff and not connected to my message and all of you. So I decided to actually take my own advice and I changed my process to this:
First, I still write out my script, that way I could have a pseudo transcript and text for my blog post. I can also organize my thoughts. I also mark where I could insert some B-Roll imagery. This lets me know what ideas I should get through completely without stopping and where I can pause.

Second, I pull out the important bullet points and make them bold and big. That includes my intro and call to action at the end.

Third, I put my script away!

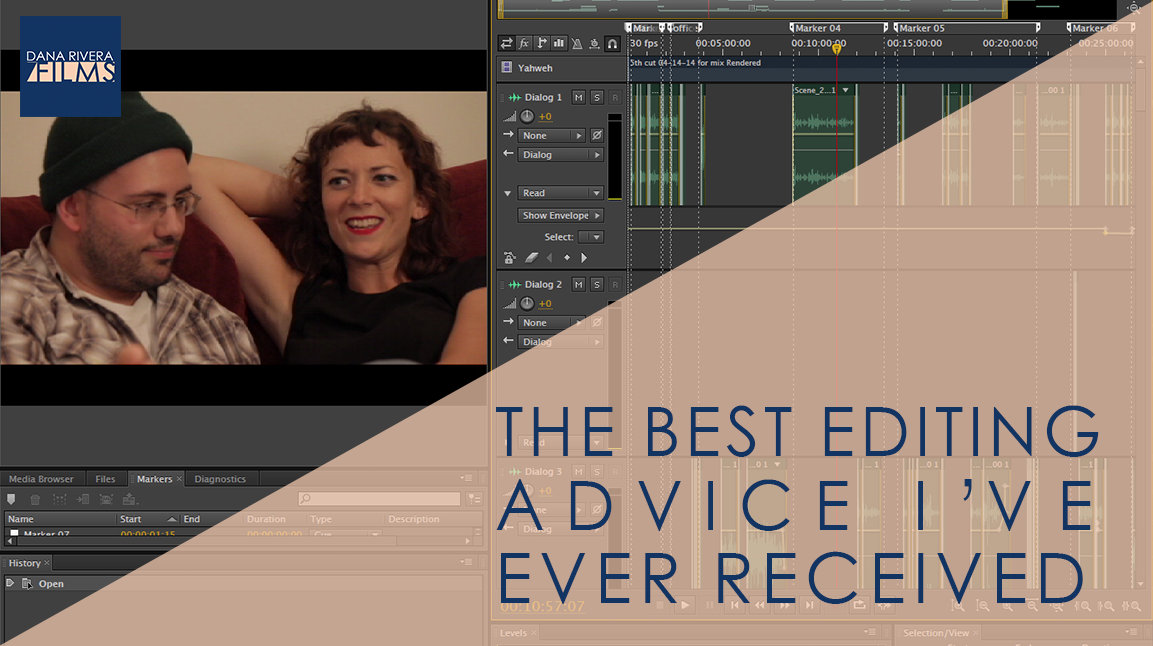
When I film now, I have my bullet points on my handy ipad, next to me, just so I can refer to it. But I try my best to just get my thoughts out there and later in editing I can make sure I’m getting to the point and add all my graphics and B-roll.

This way I can get out of my head and into the moment of when I’m speaking with you.


BUT I still believe in writing scripts and planning so please keep doing this. Just put the script away when it’s time to film. With some practice this will make all the difference, in you coming across as genuine, caring and trustworthy. 

 
If you want more tips to creating online video, download your guide to the Top 5 Video Tools that will help you make beautiful online videos for your business Or if you really ready to dive in join my free course to Amp Up You Online Video Presence. By signing up you’ll also get exclusive Tips, Tricks, How-to’s and my personal insights about editing and using Online Videomaking in your business that I only share with my VIP storytellers.


If you liked this post please comment and share. I’d love to hear from you.

Download the "How to Reach, Grow, & Teach Your Online Community" guide AND be of service like crazy!

Pick and choose the types of video you'd love to create, get your tools, and start creating!

You got it! Check your inbox!

YouTube Annotations vs. Cards

YouTube Annotations vs. Cards

Today, we are going to be talking about the YouTube cards and annotations.

I’m sure you’ve heard about the new card feature that Youtube just released that will eventually replace annotations. They both allow you to link directly on your videos to your call to action whether that is to sign up for your email list, purchase your product, or check out another one of your videos.


Originally this was going to be all about how to use annotations properly, but since cards came out I thought I’d tell you about the three things you should know.

1. Cards are mobile friendly

This is huge because the use of mobile devices is growing everyday. Now, all those people who couldn’t click directly to your website before now can.

2. You can upload images to cards and it really is just nicer looking

This is what they look like. You can see that it looks pretty nice, you get an image that’s attractive and a title there, so you don’t have to create an image in editing that you then link with annotations.

3. You can’t move cards around or choose their size

You can move around and change the colors of annotations, but you can’t for cards. AND you are limited to five per video.


Now let me show you how to add an annotation vs how to add a card.

For an annotation click on the edit button for video you want to work with in your video manager. Then click on annotations at the top. Then you can click on a point in the video that you want to add an annotation here at the bottom. On the side you can choose the type of annotation. If you click through them you can see what they do. The one I use most often is spotlight because I usually create the images that I want to link while I’m editing the video. So I create a spotlight annotation over it, set the duration and then link it.

Annotations are as easy as that. One thing you want to make sure you do is have your website verified in your settings so that you can link to it in your annotations.


Now this is how you add a card. Click on cards right at the top. Again choose the time you want the card to pop up, then  click Add Card. THen choose what type of link you are adding. Type in your url and then the rest of your options should pop up. You can upload an image, add a title and call to action text. And then click Create card and there you go.


So let’s recap, the three big differences between annotations and cards are

  1. Cards are mobile friendly
  2. You can upload images to cards and it really is just nicer looking
  3. You can’t move cards around or choose their size

 
If you want more tips to creating online video, download your guide to the Top 5 Video Tools that will help you make beautiful online videos for your business Or if you really ready to dive in join my free course to Amp Up You Online Video Presence. By signing up you’ll also get exclusive Tips, Tricks, How-to’s and my personal insights about editing and using Online Videomaking in your business that I only share with my VIP storytellers.


If you liked this post please comment and share. I’d love to hear from you.

Download the "How to Reach, Grow, & Teach Your Online Community" guide AND be of service like crazy!

Pick and choose the types of video you'd love to create, get your tools, and start creating!

You got it! Check your inbox!

Storyboarding for Your Business Videos

Storyboarding for Your Business Videos

I know you are probably super overwhelmed with working with your clients, creating your next course, and writing email newsletters and blog posts. You’re super busy and sometimes planning your videos just falls to the wayside. You want a super simple, easy, and fast process. And you can get that, but I’m telling you fast and easy doesn’t always mean great high quality video.


So if you are ready to take the time to bring your videos up a notch and are sick of writing, there is this awesome tool filmmakers use called storyboarding. It’s super fun and you’ll get to draw and get those ideas you just can’t get clear when you try to write them out.


Storyboarding does three things for you:

  1. relieves the stress of having to memorize or do everything in one take.
  2. gives you ideas for other imagery that you can show besides you talking
  3. it’s a visual document you can share with your team


Download your storyboard template.  Ok so open up the template and let’s get started. First you’ll see your header where you can put a title for the project, title of the video, the date and page number. This is really just for your organization. So let’s say we are creating a 3 part video series about creating awesome branding for an online business. So our project title is “Branding your online business 3 part training”, we are starting with “video 1 – your target market” , todays date and this is page 1.   Each of these boxes has space for three things: the shot number, an empty box for you to add your drawing or picture, and lines to add some description or text.   Let’s say shot 1 is you introducing the course and explaining what they are going to learn. We are just putting bullet points not the word for word script here. Then shot 2 can be a quick intro.  Shot 3 is you again explaining what a target market is. Now let’s say shot 4 you want to start talking about how to research your target market. Here you can show your methods. So let’s say you are explaining that they should send out surveys to past clients and in FB groups. So we can draw here an image of a sample survey or typing a question in a FB group. For every shot I want you to think, “What can I show here that would really drive the point home?” because just showing you talking for 5 minutes can really drive people away pretty quickly, just because they want to engage with other images. One word of warning: Dont get carried away trying to draw something perfect. The point is to get your ideas out visually not create an artistic masterpiece. You can even insert images digitally if you’d rather not draw. Just open up the template in photoshop or import it into word.   Those are the basics of storyboarding!   I’d recommend storyboarding before you write your script since it’ll give you an outline and you might even add or take out some language because you thought of a different way to approach a segment during storyboarding.     Don’t forget to download your storyboard template.
If you want more tips to creating online video, download your guide to the Top 5 Video Tools that will help you make beautiful online videos for your business Or if you really ready to dive in join my free course to Amp Up You Online Video Presence. By signing up you’ll also get exclusive Tips, Tricks, How-to’s and my personal insights about editing and using Online Videomaking in your business that I only share with my VIP storytellers.


If you liked this post please comment and share. I’d love to hear from you.

Download the "How to Reach, Grow, & Teach Your Online Community" guide AND be of service like crazy!

Pick and choose the types of video you'd love to create, get your tools, and start creating!

You got it! Check your inbox!

Embed a Video on Your Site without the Ugly Controls

Embed a Video on Your Site without the Ugly Controls

The first thing you want to make sure you do is have your videos uploaded to whatever host you are using. We are going to start with youtube.


YOUTUBE

Find the video you want to embed in your video dashboard and click on it. Then click on share under the video title. Choose embed, and this is the most important part, click the words show more right under the code. This is going to give you a couple of options that will change the look of the player. If you want to get rid of the title bar on top so that you’ll get a clean image of your thumbnail and the play button just uncheck “Show video title and player options” . If you want your audience to watch all the way through and not be able to skip ahead or rewind uncheck “show player controls”. I’ve seen this used a lot for webinars or training courses, but  not usually for blog posts. You can also uncheck “show suggested videos when the video finishes” Again, this is really used for your exclusive content thats isn’t publicly available. If you are embedding your video on your blog I’d suggest leaving this on, so your viewer can move on to watch more of your videos. Once you choose all of the options you want or don’t want, scroll up and copy your code. then you would paste the code into your webpage just like you normally would. I’ll show you using WordPress. And there it is!


 VIMEO

Now, let’s move on to Vimeo. For Vimeo, you can’t get rid of the player bar unless you have a pro account but you can get rid of some of the other stuff that is put by default on your thumbnail. To do this, click the paper airplane icon on the right of your video. It appears when you hover over it. What you can change here is whether the Portrait or profile picture, title, and byline appear. You can do this by unchecking these boxes. THen go up to the embed box and copy the code. Then paste it into your website.


WISTIA

For Wistia, click on the video you want to embed and then Video Actions in the top right. Choose customize in the dropdown. A side bar will appear on the left. Click on the controls box. You’ll see a few checkboxes. You can turn off and on your big play button and controls. If you play your video and uncheck the rest, your small play button, play bar, volume control,  and full screen control, you can see what they do. The great thing about Wistia is that you can go back and change these controls without having to copy and paste the embed code again. I’ll show you what I mean. Let’s grab that embed code by going back over to video actions and clicking on embed and share. Copy your code and paste into your webpage. There it is! Now let’s change a setting back in wistia and save that. Now, if you refresh your webpage the change will show up.


So that’s how you can customize the way your player looks on youtube, vimeo, and wistia and make your videos look great on your site.


If you want more tips to creating online video, download your guide to the Top 5 Video Tools that will help you make beautiful online videos for your business Or if you really ready to dive in join my free course to Amp Up You Online Video Presence. By signing up you’ll also get exclusive Tips, Tricks, How-to’s and my personal insights about editing and using Online Videomaking in your business that I only share with my VIP storytellers.


If you liked this post please comment and share. I’d love to hear from you.

Download the "How to Reach, Grow, & Teach Your Online Community" guide AND be of service like crazy!

Pick and choose the types of video you'd love to create, get your tools, and start creating!

You got it! Check your inbox!

The Best Piece of Editing Advice I’ve Ever Received

The Best Piece of Editing Advice I’ve Ever Received

Today, we are going to get a little conceptual here. You know when you think back to that moment when it all just clicked. When something someone said just made you completely understand what you’ve been trying to learn or even master. Yeah, that’s what we are talking about today. I’m super lucky that this happened to me early on when I was learning how to edit video. I was creating my first documentary which you’ve heard me talk about before and my professor said one sentence to me, “Cut for your action, don’t anticipate it.”


I know you’re thinking, what does that even mean? And how does it apply to my business videos. Let’s break it down.

It’s well known in the industry that good editing is invisible to the audience. Good editing compliments and shapes your story but doesn’t overpower it.


So what my professor was trying to tell me was don’t make a cut that helps the audience anticipate what will happen next, instead react to what’s happening and cut on the action instead of after or before it happens.


So let’s watch this clip. Did you notice the cut? Probably. and that’s because she finished her thought so you anticipated that something would happen and that was the cut and zoom.

Now watch this clip. Did you notice it there? Probably not, and that’s because we cut to the second angle during the action.


Now how does this help you? Editing your videos like this will create an association in your viewers head with high quality video content. It’s what I call the HBO effect.

HBO is a television network. Period. But you know how everyone reacts to it. Everyone wants it, is willing to pay extra for it and praises their shows to no end. Why? because their shows are filmed like movies. They treat each show like an hour long film. You can see it in the writing, filming and especially the editing. They use editing techniques like what I just showed you to create mini films not TV shows. And other networks like AMC and FX quickly followed suit.


So how can you do this?

First, think about your scripts; when are the natural pauses that give your audience space to digest, when do you need to keep moving? This might sound like the opposite of what you would expect, but cut more when you need to keep moving and slow down the cuts for the natural pauses.


If you’re ready, introduce a second camera to your setup. This will allow you to cut between 2 different angles and create that flow of action that you saw in that clip. So that instead of cutting after a sentence or thought you can cut during that thought and it’ll appear seamless.


If you want more tips to creating online video, download your guide to the Top 5 Video Tools that will help you make beautiful online videos for your business Or if you really ready to dive in join my free course to Amp Up You Online Video Presence. By signing up you’ll also get exclusive Tips, Tricks, How-to’s and my personal insights about editing and using Online Videomaking in your business that I only share with my VIP storytellers.


If you liked this post please comment and share. I’d love to hear from you.

Download the "How to Reach, Grow, & Teach Your Online Community" guide AND be of service like crazy!

Pick and choose the types of video you'd love to create, get your tools, and start creating!

You got it! Check your inbox!

The Best Ways to Organize Your Video Files

If you knew me you’d be so annoyed by what an organization freak I can be. The funny thing is that it’s only when it comes to my computer and technology. You can look on my computer and see everything carefully labeled and broken down in folders. Look to your left and see harddrives lined up in a perfect row in cases. But walk over and look at my closet and you wouldn’t think both belonged to the same person.

Now, I have my reasons. Video means the world to me. After all, it is my job and business, so I need to take really good care of it. But there are technical reasons that would blow up my entire workflow if I wasn’t organized. So I wanted to share with you my biggest tip when it comes to organizing your computer for the videos you produce for your business.

It’s all about file structure. Yeah, maybe that sounds too boring and techy. But believe me this will save you sooo much headache and time down the road.


Here’s what your file structure should look like:

Screen Shot 2015-01-09 at 11.37.03 AM

Audio: The sounds or “tracks” that are recorded during filming or gathered afterwards. This includes dialogue and sounds you need to add in like doorbells, water, etc.

Footage: This is only what you film yourself, so if you are filming your vlog episodes this would be the video of you speaking to the camera.

B-Roll: B-Roll are the images and video that you are going to show in your video as you speak about the corresponding topic. So, if you are talking about your website, you could show the website. The image of the website would be B-Roll.

Graphics: This includes your intro, outro, text graphics, website banner, social media banner, and any other animated or static designs that will appear in the video.

*Quick Tip: If you have graphics that you reuse over and over again, don’t copy and paste them into every new video folder you create, just put them in one folder called “Branded Graphics” and just import them into your editing program from this file.

Screen Shot 2015-01-09 at 12.05.37 PM

Music: This is very different from your audio folder. Here you only place music soundtracks; so your intro and outro jingles and any music to run through your entire video.

Scripts/documents: Here you’ll put all your drafts of your scripts, any research, schedules or planning documents.

Stills/Pictures: This includes your thumbnails and any pictures that inspired the video that will NOT be used in the video.


Organizing your videos like this is important for two reasons:

1. You and your team will be able to find anything you need quickly.

2. Most editing programs now reference your files instead of applying your edits to the original source file. So, if you move your files on your computer after you’ve imported them into your editing program, the program will no longer know where to look and you’ll get a message saying “media disconnected”.

Think of it like a street address. Your friend told you about this great restaurant a few months ago and gave you the address. You type it into your GPS and follow the directions. When you get there, you see a sign that says that the restaurant has moved to another location.

When you import your footage you are giving the program an address to your files. If you move your files, the computer will look for them at that same address, but come up empty handed. You’ll have to tell it where you moved your files in order to get it working again.


So, to avoid this frustration you should be organizing your files first thing. Now, add this to your video to-do list. It only takes seconds. I promise!


If you want more tips to creating online video, download your guide below to the Top 5 Video Tools that will help you make beautiful online videos for your business by clicking the button below Or if you really ready to dive in join my free course to Amp Up You Online Video Presence. By signing up you’ll also get exclusive Tips, Tricks, How-to’s and my personal insights about Online Videomaking & Editing that I only share in email.

Download the "How to Reach, Grow, & Teach Your Online Community" guide AND be of service like crazy!

Pick and choose the types of video you'd love to create, get your tools, and start creating!

You got it! Check your inbox!

Page 3 of 41234