Storyboarding for Your Business Videos

Storyboarding for Your Business Videos

I know you are probably super overwhelmed with working with your clients, creating your next course, and writing email newsletters and blog posts. You’re super busy and sometimes planning your videos just falls to the wayside. You want a super simple, easy, and fast process. And you can get that, but I’m telling you fast and easy doesn’t always mean great high quality video.


So if you are ready to take the time to bring your videos up a notch and are sick of writing, there is this awesome tool filmmakers use called storyboarding. It’s super fun and you’ll get to draw and get those ideas you just can’t get clear when you try to write them out.


Storyboarding does three things for you:

  1. relieves the stress of having to memorize or do everything in one take.
  2. gives you ideas for other imagery that you can show besides you talking
  3. it’s a visual document you can share with your team


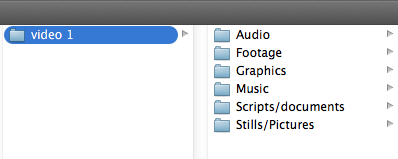
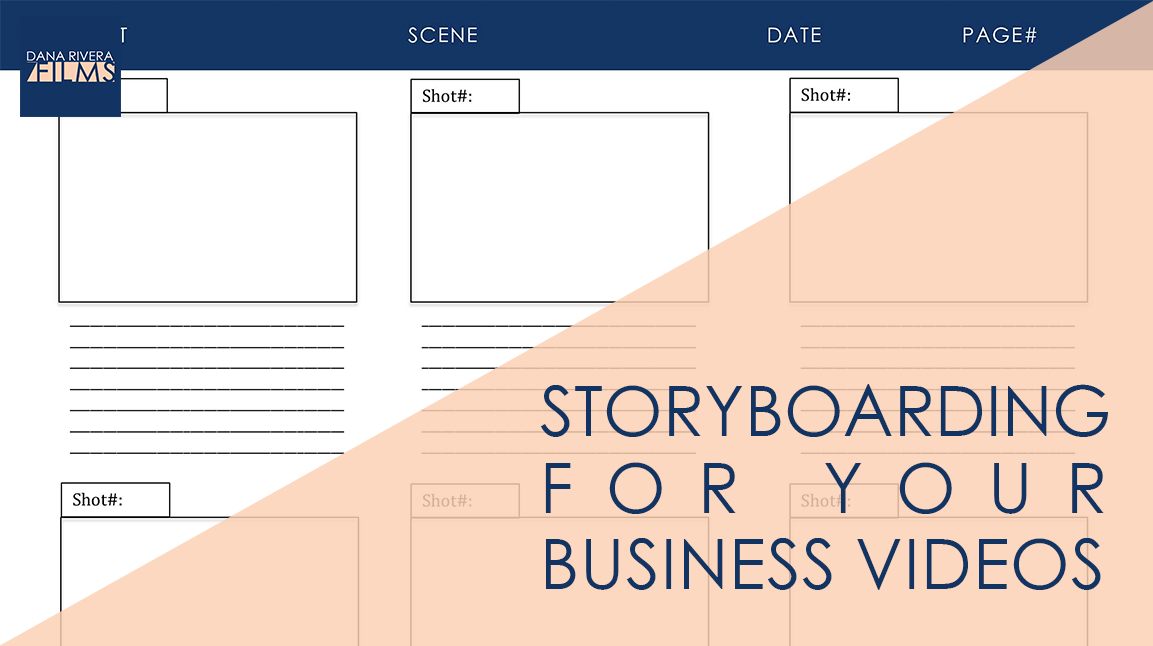
Download your storyboard template.  Ok so open up the template and let’s get started. First you’ll see your header where you can put a title for the project, title of the video, the date and page number. This is really just for your organization. So let’s say we are creating a 3 part video series about creating awesome branding for an online business. So our project title is “Branding your online business 3 part training”, we are starting with “video 1 – your target market” , todays date and this is page 1.   Each of these boxes has space for three things: the shot number, an empty box for you to add your drawing or picture, and lines to add some description or text.   Let’s say shot 1 is you introducing the course and explaining what they are going to learn. We are just putting bullet points not the word for word script here. Then shot 2 can be a quick intro.  Shot 3 is you again explaining what a target market is. Now let’s say shot 4 you want to start talking about how to research your target market. Here you can show your methods. So let’s say you are explaining that they should send out surveys to past clients and in FB groups. So we can draw here an image of a sample survey or typing a question in a FB group. For every shot I want you to think, “What can I show here that would really drive the point home?” because just showing you talking for 5 minutes can really drive people away pretty quickly, just because they want to engage with other images. One word of warning: Dont get carried away trying to draw something perfect. The point is to get your ideas out visually not create an artistic masterpiece. You can even insert images digitally if you’d rather not draw. Just open up the template in photoshop or import it into word.   Those are the basics of storyboarding!   I’d recommend storyboarding before you write your script since it’ll give you an outline and you might even add or take out some language because you thought of a different way to approach a segment during storyboarding.     Don’t forget to download your storyboard template.
If you want more tips to creating online video, download your guide to the Top 5 Video Tools that will help you make beautiful online videos for your business Or if you really ready to dive in join my free course to Amp Up You Online Video Presence. By signing up you’ll also get exclusive Tips, Tricks, How-to’s and my personal insights about editing and using Online Videomaking in your business that I only share with my VIP storytellers.


If you liked this post please comment and share. I’d love to hear from you.

Download the "How to Reach, Grow, & Teach Your Online Community" guide AND be of service like crazy!

Pick and choose the types of video you'd love to create, get your tools, and start creating!

You got it! Check your inbox!

Embed a Video on Your Site without the Ugly Controls

Embed a Video on Your Site without the Ugly Controls

The first thing you want to make sure you do is have your videos uploaded to whatever host you are using. We are going to start with youtube.


YOUTUBE

Find the video you want to embed in your video dashboard and click on it. Then click on share under the video title. Choose embed, and this is the most important part, click the words show more right under the code. This is going to give you a couple of options that will change the look of the player. If you want to get rid of the title bar on top so that you’ll get a clean image of your thumbnail and the play button just uncheck “Show video title and player options” . If you want your audience to watch all the way through and not be able to skip ahead or rewind uncheck “show player controls”. I’ve seen this used a lot for webinars or training courses, but  not usually for blog posts. You can also uncheck “show suggested videos when the video finishes” Again, this is really used for your exclusive content thats isn’t publicly available. If you are embedding your video on your blog I’d suggest leaving this on, so your viewer can move on to watch more of your videos. Once you choose all of the options you want or don’t want, scroll up and copy your code. then you would paste the code into your webpage just like you normally would. I’ll show you using WordPress. And there it is!


 VIMEO

Now, let’s move on to Vimeo. For Vimeo, you can’t get rid of the player bar unless you have a pro account but you can get rid of some of the other stuff that is put by default on your thumbnail. To do this, click the paper airplane icon on the right of your video. It appears when you hover over it. What you can change here is whether the Portrait or profile picture, title, and byline appear. You can do this by unchecking these boxes. THen go up to the embed box and copy the code. Then paste it into your website.


WISTIA

For Wistia, click on the video you want to embed and then Video Actions in the top right. Choose customize in the dropdown. A side bar will appear on the left. Click on the controls box. You’ll see a few checkboxes. You can turn off and on your big play button and controls. If you play your video and uncheck the rest, your small play button, play bar, volume control,  and full screen control, you can see what they do. The great thing about Wistia is that you can go back and change these controls without having to copy and paste the embed code again. I’ll show you what I mean. Let’s grab that embed code by going back over to video actions and clicking on embed and share. Copy your code and paste into your webpage. There it is! Now let’s change a setting back in wistia and save that. Now, if you refresh your webpage the change will show up.


So that’s how you can customize the way your player looks on youtube, vimeo, and wistia and make your videos look great on your site.


If you want more tips to creating online video, download your guide to the Top 5 Video Tools that will help you make beautiful online videos for your business Or if you really ready to dive in join my free course to Amp Up You Online Video Presence. By signing up you’ll also get exclusive Tips, Tricks, How-to’s and my personal insights about editing and using Online Videomaking in your business that I only share with my VIP storytellers.


If you liked this post please comment and share. I’d love to hear from you.

Download the "How to Reach, Grow, & Teach Your Online Community" guide AND be of service like crazy!

Pick and choose the types of video you'd love to create, get your tools, and start creating!

You got it! Check your inbox!

The Best Piece of Editing Advice I’ve Ever Received

The Best Piece of Editing Advice I’ve Ever Received

Today, we are going to get a little conceptual here. You know when you think back to that moment when it all just clicked. When something someone said just made you completely understand what you’ve been trying to learn or even master. Yeah, that’s what we are talking about today. I’m super lucky that this happened to me early on when I was learning how to edit video. I was creating my first documentary which you’ve heard me talk about before and my professor said one sentence to me, “Cut for your action, don’t anticipate it.”


I know you’re thinking, what does that even mean? And how does it apply to my business videos. Let’s break it down.

It’s well known in the industry that good editing is invisible to the audience. Good editing compliments and shapes your story but doesn’t overpower it.


So what my professor was trying to tell me was don’t make a cut that helps the audience anticipate what will happen next, instead react to what’s happening and cut on the action instead of after or before it happens.


So let’s watch this clip. Did you notice the cut? Probably. and that’s because she finished her thought so you anticipated that something would happen and that was the cut and zoom.

Now watch this clip. Did you notice it there? Probably not, and that’s because we cut to the second angle during the action.


Now how does this help you? Editing your videos like this will create an association in your viewers head with high quality video content. It’s what I call the HBO effect.

HBO is a television network. Period. But you know how everyone reacts to it. Everyone wants it, is willing to pay extra for it and praises their shows to no end. Why? because their shows are filmed like movies. They treat each show like an hour long film. You can see it in the writing, filming and especially the editing. They use editing techniques like what I just showed you to create mini films not TV shows. And other networks like AMC and FX quickly followed suit.


So how can you do this?

First, think about your scripts; when are the natural pauses that give your audience space to digest, when do you need to keep moving? This might sound like the opposite of what you would expect, but cut more when you need to keep moving and slow down the cuts for the natural pauses.


If you’re ready, introduce a second camera to your setup. This will allow you to cut between 2 different angles and create that flow of action that you saw in that clip. So that instead of cutting after a sentence or thought you can cut during that thought and it’ll appear seamless.


If you want more tips to creating online video, download your guide to the Top 5 Video Tools that will help you make beautiful online videos for your business Or if you really ready to dive in join my free course to Amp Up You Online Video Presence. By signing up you’ll also get exclusive Tips, Tricks, How-to’s and my personal insights about editing and using Online Videomaking in your business that I only share with my VIP storytellers.


If you liked this post please comment and share. I’d love to hear from you.

Download the "How to Reach, Grow, & Teach Your Online Community" guide AND be of service like crazy!

Pick and choose the types of video you'd love to create, get your tools, and start creating!

You got it! Check your inbox!

The 4 Ways Every  Photographer  Should Be  Using Video

The 4 Ways Every Photographer Should Be Using Video

On a typical weekday, I sat in the waiting room of the doctor’s office, waiting, waiting and waiting some more. I usually glue myself to my phone while I sit there, but a magazine on the table next to me caught my eye; The “Pocono Flair”. How typically charming of you, small town Pennsylvania. As I flipped through the pages, I saw a profile of a local photographer. Having recently come back to my hometown I was itching to connect with local visual artists. As I read on, I saw that she graduated from the same undergraduate program at the same school! Was it fate? I had only heard of two other people from my area going to Ithaca College and I happened upon someone from the same program that was running her own business here in the Poconos, Smile Peace Love Photography (She’s amazing. Please check her out). I knew I had to reach out to her, and wouldn’t you know she was looking for someone to run the video side of her business. And we’ve been working together ever since. Now I think that was meant to be (Yes, I’m one of those weirdos that believe in signs from the universe and definitely doesn’t take them lightly).

From our meetings to our first wedding shoot together, I paid close attention to how she interacted with clients, talked about her work, and over delivered on literally everything. She exposed me to the 4 ways every photographer should be aspiring to use video in their business:


1. Behind the scenes footage

As a photographer your clients are trusting you with capturing their biggest moments; their wedding, family portraits, or Sweet 16. Developing your know, like, and trust factor is incredibly important because of this. Showing them “Your How” builds that trust; your process for making your clients comfortable, how you communicate before and after shoots, how they order prints, how you design books. If transparency is important to you and your brand, video is a clear and concise way to deliver this to your clients.

2. Be invisible on the shoot, but Show your personality before and after

Most professional photographers would agree that being invisible on a shoot is integral to allowing your client to be in their moment, completely natural. The last thing you want to hear is that your couple wanted to go enjoy the party but felt that the photography session was a time burden. Or that you were in the way while the bridesmaids tried to walk down the aisle. BUT don’t hesitate to show who you are before, after and in all your communication with your clients, whether that’s through a blog, your photos, or even a promotional video that describes your business.

3. Get in front of the camera

Don’t let the camera be the barrier between you and your clients. Don’t let them wonder how someone who has never been in front of the camera can make them feel comfortable or understand how they feel on the other side of the lens. Shoot a video as an example of how you also had to work up the courage to be on camera. Share how you felt and be honest.

4. Educate others

As entrepreneurs, we have a natural tendency towards giving back to the communities that helped build us up. The desire to teach others our skills is natural whether that’s through a blog, emails, workshops, events, or video courses. Creating your own video course for young photographers in your area to invest in, is not only a resource that was previously not available, but another stream of income for you. Why not even create a scholarship program?


Even if you’re not a photographer, you can introduce videos in similar ways into your business. You’ll build trust, connect with clients, and build relationships with your community. All you need is a plan and the motivation.

Your first step is to sign up for my free course all about amping up your business’ online presence with video. Then, connect with me on facebook and twitter. I’d love to learn more about you and your business. And if you liked this post, feel free to share with friends and family. Until next time!

Download the "How to Reach, Grow, & Teach Your Online Community" guide AND be of service like crazy!

Pick and choose the types of video you'd love to create, get your tools, and start creating!

You got it! Check your inbox!

The Best Ways to Organize Your Video Files

If you knew me you’d be so annoyed by what an organization freak I can be. The funny thing is that it’s only when it comes to my computer and technology. You can look on my computer and see everything carefully labeled and broken down in folders. Look to your left and see harddrives lined up in a perfect row in cases. But walk over and look at my closet and you wouldn’t think both belonged to the same person.

Now, I have my reasons. Video means the world to me. After all, it is my job and business, so I need to take really good care of it. But there are technical reasons that would blow up my entire workflow if I wasn’t organized. So I wanted to share with you my biggest tip when it comes to organizing your computer for the videos you produce for your business.

It’s all about file structure. Yeah, maybe that sounds too boring and techy. But believe me this will save you sooo much headache and time down the road.


Here’s what your file structure should look like:

Screen Shot 2015-01-09 at 11.37.03 AM

Audio: The sounds or “tracks” that are recorded during filming or gathered afterwards. This includes dialogue and sounds you need to add in like doorbells, water, etc.

Footage: This is only what you film yourself, so if you are filming your vlog episodes this would be the video of you speaking to the camera.

B-Roll: B-Roll are the images and video that you are going to show in your video as you speak about the corresponding topic. So, if you are talking about your website, you could show the website. The image of the website would be B-Roll.

Graphics: This includes your intro, outro, text graphics, website banner, social media banner, and any other animated or static designs that will appear in the video.

*Quick Tip: If you have graphics that you reuse over and over again, don’t copy and paste them into every new video folder you create, just put them in one folder called “Branded Graphics” and just import them into your editing program from this file.

Screen Shot 2015-01-09 at 12.05.37 PM

Music: This is very different from your audio folder. Here you only place music soundtracks; so your intro and outro jingles and any music to run through your entire video.

Scripts/documents: Here you’ll put all your drafts of your scripts, any research, schedules or planning documents.

Stills/Pictures: This includes your thumbnails and any pictures that inspired the video that will NOT be used in the video.


Organizing your videos like this is important for two reasons:

1. You and your team will be able to find anything you need quickly.

2. Most editing programs now reference your files instead of applying your edits to the original source file. So, if you move your files on your computer after you’ve imported them into your editing program, the program will no longer know where to look and you’ll get a message saying “media disconnected”.

Think of it like a street address. Your friend told you about this great restaurant a few months ago and gave you the address. You type it into your GPS and follow the directions. When you get there, you see a sign that says that the restaurant has moved to another location.

When you import your footage you are giving the program an address to your files. If you move your files, the computer will look for them at that same address, but come up empty handed. You’ll have to tell it where you moved your files in order to get it working again.


So, to avoid this frustration you should be organizing your files first thing. Now, add this to your video to-do list. It only takes seconds. I promise!


If you want more tips to creating online video, download your guide below to the Top 5 Video Tools that will help you make beautiful online videos for your business by clicking the button below Or if you really ready to dive in join my free course to Amp Up You Online Video Presence. By signing up you’ll also get exclusive Tips, Tricks, How-to’s and my personal insights about Online Videomaking & Editing that I only share in email.

Download the "How to Reach, Grow, & Teach Your Online Community" guide AND be of service like crazy!

Pick and choose the types of video you'd love to create, get your tools, and start creating!

You got it! Check your inbox!

Page 7 of 25« First...56789...20...Last »