Embed a Video on Your Site without the Ugly Controls

Embed a Video on Your Site without the Ugly Controls

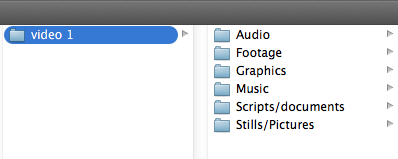
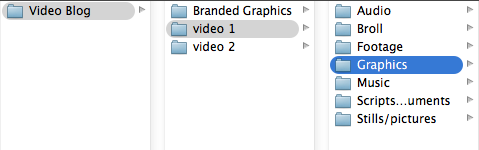
The first thing you want to make sure you do is have your videos uploaded to whatever host you are using. We are going to start with youtube.


YOUTUBE

Find the video you want to embed in your video dashboard and click on it. Then click on share under the video title. Choose embed, and this is the most important part, click the words show more right under the code. This is going to give you a couple of options that will change the look of the player. If you want to get rid of the title bar on top so that you’ll get a clean image of your thumbnail and the play button just uncheck “Show video title and player options” . If you want your audience to watch all the way through and not be able to skip ahead or rewind uncheck “show player controls”. I’ve seen this used a lot for webinars or training courses, but  not usually for blog posts. You can also uncheck “show suggested videos when the video finishes” Again, this is really used for your exclusive content thats isn’t publicly available. If you are embedding your video on your blog I’d suggest leaving this on, so your viewer can move on to watch more of your videos. Once you choose all of the options you want or don’t want, scroll up and copy your code. then you would paste the code into your webpage just like you normally would. I’ll show you using WordPress. And there it is!


 VIMEO

Now, let’s move on to Vimeo. For Vimeo, you can’t get rid of the player bar unless you have a pro account but you can get rid of some of the other stuff that is put by default on your thumbnail. To do this, click the paper airplane icon on the right of your video. It appears when you hover over it. What you can change here is whether the Portrait or profile picture, title, and byline appear. You can do this by unchecking these boxes. THen go up to the embed box and copy the code. Then paste it into your website.


WISTIA

For Wistia, click on the video you want to embed and then Video Actions in the top right. Choose customize in the dropdown. A side bar will appear on the left. Click on the controls box. You’ll see a few checkboxes. You can turn off and on your big play button and controls. If you play your video and uncheck the rest, your small play button, play bar, volume control,  and full screen control, you can see what they do. The great thing about Wistia is that you can go back and change these controls without having to copy and paste the embed code again. I’ll show you what I mean. Let’s grab that embed code by going back over to video actions and clicking on embed and share. Copy your code and paste into your webpage. There it is! Now let’s change a setting back in wistia and save that. Now, if you refresh your webpage the change will show up.


So that’s how you can customize the way your player looks on youtube, vimeo, and wistia and make your videos look great on your site.


If you want more tips to creating online video, download your guide to the Top 5 Video Tools that will help you make beautiful online videos for your business Or if you really ready to dive in join my free course to Amp Up You Online Video Presence. By signing up you’ll also get exclusive Tips, Tricks, How-to’s and my personal insights about editing and using Online Videomaking in your business that I only share with my VIP storytellers.


If you liked this post please comment and share. I’d love to hear from you.

Download the "How to Reach, Grow, & Teach Your Online Community" guide AND be of service like crazy!

Pick and choose the types of video you'd love to create, get your tools, and start creating!

You got it! Check your inbox!

The Best Ways to Organize Your Video Files

If you knew me you’d be so annoyed by what an organization freak I can be. The funny thing is that it’s only when it comes to my computer and technology. You can look on my computer and see everything carefully labeled and broken down in folders. Look to your left and see harddrives lined up in a perfect row in cases. But walk over and look at my closet and you wouldn’t think both belonged to the same person.

Now, I have my reasons. Video means the world to me. After all, it is my job and business, so I need to take really good care of it. But there are technical reasons that would blow up my entire workflow if I wasn’t organized. So I wanted to share with you my biggest tip when it comes to organizing your computer for the videos you produce for your business.

It’s all about file structure. Yeah, maybe that sounds too boring and techy. But believe me this will save you sooo much headache and time down the road.


Here’s what your file structure should look like:

Screen Shot 2015-01-09 at 11.37.03 AM

Audio: The sounds or “tracks” that are recorded during filming or gathered afterwards. This includes dialogue and sounds you need to add in like doorbells, water, etc.

Footage: This is only what you film yourself, so if you are filming your vlog episodes this would be the video of you speaking to the camera.

B-Roll: B-Roll are the images and video that you are going to show in your video as you speak about the corresponding topic. So, if you are talking about your website, you could show the website. The image of the website would be B-Roll.

Graphics: This includes your intro, outro, text graphics, website banner, social media banner, and any other animated or static designs that will appear in the video.

*Quick Tip: If you have graphics that you reuse over and over again, don’t copy and paste them into every new video folder you create, just put them in one folder called “Branded Graphics” and just import them into your editing program from this file.

Screen Shot 2015-01-09 at 12.05.37 PM

Music: This is very different from your audio folder. Here you only place music soundtracks; so your intro and outro jingles and any music to run through your entire video.

Scripts/documents: Here you’ll put all your drafts of your scripts, any research, schedules or planning documents.

Stills/Pictures: This includes your thumbnails and any pictures that inspired the video that will NOT be used in the video.


Organizing your videos like this is important for two reasons:

1. You and your team will be able to find anything you need quickly.

2. Most editing programs now reference your files instead of applying your edits to the original source file. So, if you move your files on your computer after you’ve imported them into your editing program, the program will no longer know where to look and you’ll get a message saying “media disconnected”.

Think of it like a street address. Your friend told you about this great restaurant a few months ago and gave you the address. You type it into your GPS and follow the directions. When you get there, you see a sign that says that the restaurant has moved to another location.

When you import your footage you are giving the program an address to your files. If you move your files, the computer will look for them at that same address, but come up empty handed. You’ll have to tell it where you moved your files in order to get it working again.


So, to avoid this frustration you should be organizing your files first thing. Now, add this to your video to-do list. It only takes seconds. I promise!


If you want more tips to creating online video, download your guide below to the Top 5 Video Tools that will help you make beautiful online videos for your business by clicking the button below Or if you really ready to dive in join my free course to Amp Up You Online Video Presence. By signing up you’ll also get exclusive Tips, Tricks, How-to’s and my personal insights about Online Videomaking & Editing that I only share in email.

Download the "How to Reach, Grow, & Teach Your Online Community" guide AND be of service like crazy!

Pick and choose the types of video you'd love to create, get your tools, and start creating!

You got it! Check your inbox!

YouTube, Wistia, or Vimeo?

YouTube, Wistia, or Vimeo?

Ok this is a question that comes up over and over again. YouTube, Wistia, or Vimeo? I want to simplify it for you. The answer is YES! Use all three.

There is no war going on between these 3 hosting sites because they have 3 completely different purposes.


YouTube is to get found.

Wistia is for business.

And Vimeo is to share art.


Let me explain a little more.

YouTube is the second largely used search engine behind google, so if you want people to search keywords and organically find your videos, this is the perfect tool. It also has annotations which are clickable links that you can add to videos to link your audience to your sites. If your hover over my logo in the corner you’ll see that you can click on it and it’ll take you to my website. It’s the best for weekly TV shows, Vlogs, and interview series.

Vimeo is much like YouTube in that it is searchable, however it’s geared much more towards the arts (filmmaking, photography, animation and other things like that). The advantages of Vimeo is the much nicer looking player that when embedded on your site look less clunky than YouTube and the ability to have more control on where your videos are accessed from. For example, say you have a video course that you only want accessed when people sign up for your email list. You would want the videos to only be embedded on your pages and not searchable in Vimeo. With the free and pro features you can easily pull off great looking video courses and promotional landing page videos. The big drawback is that you can’t have clickable links on-screen.


Wistia is GREAT for businesses. If you are creating a video series to launch a product, or as an opt in offer, or even a landing page video, you need to get this tool. The basic features are free and with a small investment you can get some great small business controls. Wistia is not searchable like Vimeo or YouTube but it has clickable links (called mid roll links), post roll call to action links, complete customization over the design of the player, and so much control over who can access your videos from where. This is also awesome for sharing video content privately with your team or assistants.


If you want more tips to creating online video, download your guide to the Top 5 Video Tools that will help you make beautiful online videos for your business by clicking the button below. By signing up you’ll also get exclusive Tips, Tricks, How-to’s and my personal insights about Online Videomaking that I only share in email.


If you liked this post please comment and share. I’d love to hear from you.


Download the "How to Reach, Grow, & Teach Your Online Community" guide AND be of service like crazy!

Pick and choose the types of video you'd love to create, get your tools, and start creating!

You got it! Check your inbox!

Top 5 Ways to Prepare to Film Yourself for Your Online Video Series: Number 1 May Surprise You

Top 5 Ways to Prepare to Film Yourself for Your Online Video Series: Number 1 May Surprise You

5.     Plan

Do you want a personal, conversational vibe or a produced video vibe? This effects your scripts, the location, and how you shoot. Once you decide on your style, outline your video topics and create scripts. When you are first starting, it’s helpful to write word for word scripts so you don’t have to worry about what you are going to say or how you appear on camera. But don’t feel caged in by your script – it’s just there to guide you. Don’t overwhelm yourself by trying to memorize the entire script.


Also remember that you can change your camera angles, or, if you have two cameras available to you, have two setup at 30-degree angles from each other.  Break your scripts into manageable parts and change the camera angle when you pause. Then edit them together later and the dialogue will appear seamless.


Productivity Tip: Plan all of your videos that need to be released on a deadline and shoot them all in one day. For example, if you release one video a week, shoot all four videos for one month in one day. Then you’ll maintain visual consistency and won’t have to setup your video studio multiple times a month. Just be careful to not over-schedule and burn yourself out.


4.     Invest in a stool.

A stool forces you to sit tall and look more professional. Its important to not slouch because the camera exaggerates everything, so even if you think you are only a little slouched, it will appear as if you are not enthusiastic about your message. And DO NOT use a stool that spins or has wheels – it can be distracting to both you and the camera.


3.     Make friends with your camera

Get to know your camera and use it to your advantage. Take at least an hour to learn the functions of your camera before you shoot; find out what settings look best in your shooting location, or where it should be placed to make you look great. Name your camera or put a picture of someone that makes you feel comfortable on the side of the lens and focus on that picture. Change it from an intimidating object to a great friend that is helping you get your message to your community.


2.     Get in the Zone.

To connect with your viewers, it is important to be yourself. Even if you want to have a professional feel to all of your videos, you can still show your personality. So do whatever you need to feel like the best you. This could mean meditating, exercising, or listening to a song that motivates or calms you. I like to sing my favorite song out loud and sometimes even dance. This warms up your voice and your body. When you feel comfortable in your voice and body, it projects through the camera and your viewers can’t help but to relate to you.


1.     Breathe and Stretch

I’m far from a fitness expert, but I did take dance classes until I was 16, and the one thing I value the most about those classes was learning how to stretch. Whenever I am getting ready to shoot, whether I am behind or in front of the camera, I do three simple stretches while taking deep breaths. And yes you can even do these stretches in the dress you plan to wear on camera.

–       Stand straight and tall, lift your arms above your head and grab one hand with the other and push up to lengthen your spine.  You can even lean to each side as you push.

–       Stretch your neck by leaning your head to one shoulder, then the other, forward, and back. Do a couple of these clockwise and counter clockwise.

–       Stretch your legs by bending one leg behind you at a time and hold it with your hand. Hold onto a wall if you need balance.

Again I’m not a fitness coach or doctor so I’m always careful when stretching.


AND remember that you don’t need the best camera or the technical knowledge to start your web series or YouTube business channel. YouTube is a search engine just like Google, so it’s really important to develop your YouTube presence to get found. So don’t wait to get started. If you want more tips on how to film yourself and look great, click on one of the images below to get on our storyteller list. If you loved this post don’t forget to share and comment.

Download the "How to Reach, Grow, & Teach Your Online Community" guide AND be of service like crazy!

Pick and choose the types of video you'd love to create, get your tools, and start creating!

You got it! Check your inbox!

Page 2 of 212