Today, we are going to be talking about the YouTube cards and annotations.
I’m sure you’ve heard about the new card feature that Youtube just released that will eventually replace annotations. They both allow you to link directly on your videos to your call to action whether that is to sign up for your email list, purchase your product, or check out another one of your videos.
Originally this was going to be all about how to use annotations properly, but since cards came out I thought I’d tell you about the three things you should know.
1. Cards are mobile friendly
This is huge because the use of mobile devices is growing everyday. Now, all those people who couldn’t click directly to your website before now can.
2. You can upload images to cards and it really is just nicer looking
This is what they look like. You can see that it looks pretty nice, you get an image that’s attractive and a title there, so you don’t have to create an image in editing that you then link with annotations.
3. You can’t move cards around or choose their size
You can move around and change the colors of annotations, but you can’t for cards. AND you are limited to five per video.
Now let me show you how to add an annotation vs how to add a card.
For an annotation click on the edit button for video you want to work with in your video manager. Then click on annotations at the top. Then you can click on a point in the video that you want to add an annotation here at the bottom. On the side you can choose the type of annotation. If you click through them you can see what they do. The one I use most often is spotlight because I usually create the images that I want to link while I’m editing the video. So I create a spotlight annotation over it, set the duration and then link it.
Annotations are as easy as that. One thing you want to make sure you do is have your website verified in your settings so that you can link to it in your annotations.
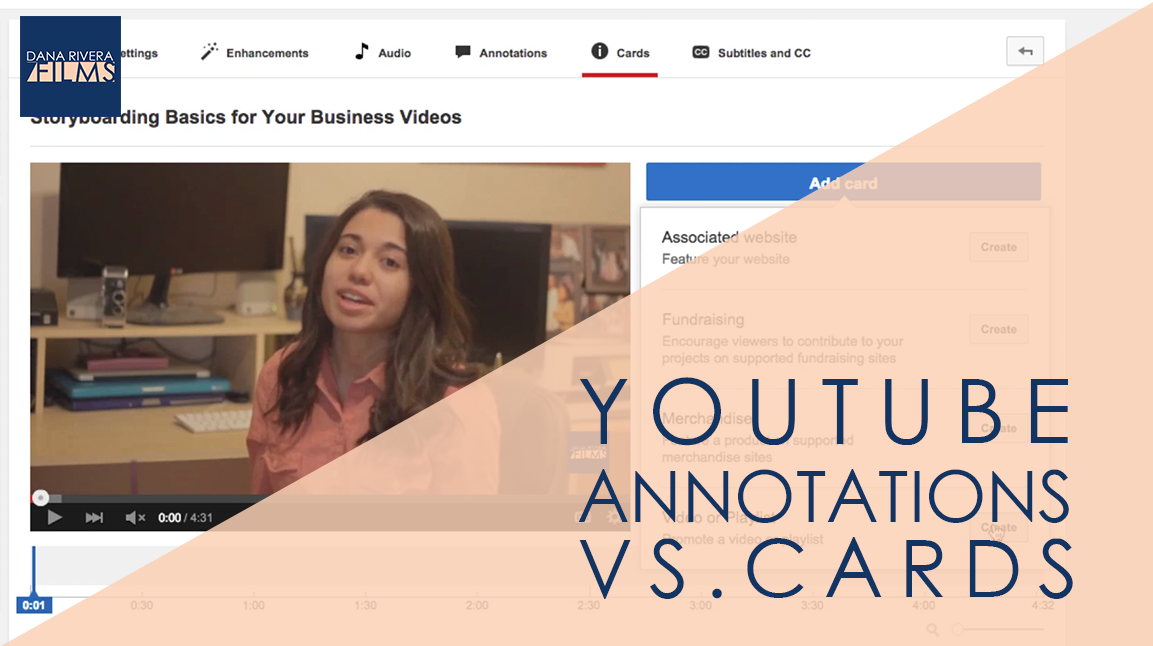
Now this is how you add a card. Click on cards right at the top. Again choose the time you want the card to pop up, then click Add Card. THen choose what type of link you are adding. Type in your url and then the rest of your options should pop up. You can upload an image, add a title and call to action text. And then click Create card and there you go.
So let’s recap, the three big differences between annotations and cards are
- Cards are mobile friendly
- You can upload images to cards and it really is just nicer looking
- You can’t move cards around or choose their size
If you want more tips to creating online video, download your guide to the Top 5 Video Tools that will help you make beautiful online videos for your business Or if you really ready to dive in join my free course to Amp Up You Online Video Presence. By signing up you’ll also get exclusive Tips, Tricks, How-to’s and my personal insights about editing and using Online Videomaking in your business that I only share with my VIP storytellers.
If you liked this post please comment and share. I’d love to hear from you.
Download the "How to Reach, Grow, & Teach Your Online Community" guide AND be of service like crazy!
Pick and choose the types of video you'd love to create, get your tools, and start creating!
